30 Easy DIY Christmas Decorations You Can Make This Weekend
This post contains affiliate links. As an Amazon Associate, I earn from qualifying purchases at no extra cost to you.
The decorations you make yourself bring a different kind of warmth to a room. An uneven paper star or a bow tied from leftover ribbon can become the detail you look forward to unpacking each year.
These DIY Christmas decorations use approachable materials and small work surfaces. Pick a few projects for the weekend, gather the supplies before starting and allow extra drying time where glue or paint is involved.
Favorite Finds for This Look
Useful pieces to compare before you start shopping.
These are shopping ideas selected for their role in the looks below. Measure your space and check materials, care instructions and current product details before ordering.
Cardstock in a Small Color Palette
Cream, sage and deep red paper work together across stars, chains and gift tags.
Felt Sheets and Fabric Glue
Felt does not fray at the edges, making it useful for simple ornaments and small garlands.
Ribbon and Cotton Twine
Keep a selection of ribbon widths for bows, hanging loops and small finishing touches.
Paper Decorations for Walls and Windows
Lightweight projects that use inexpensive materials.
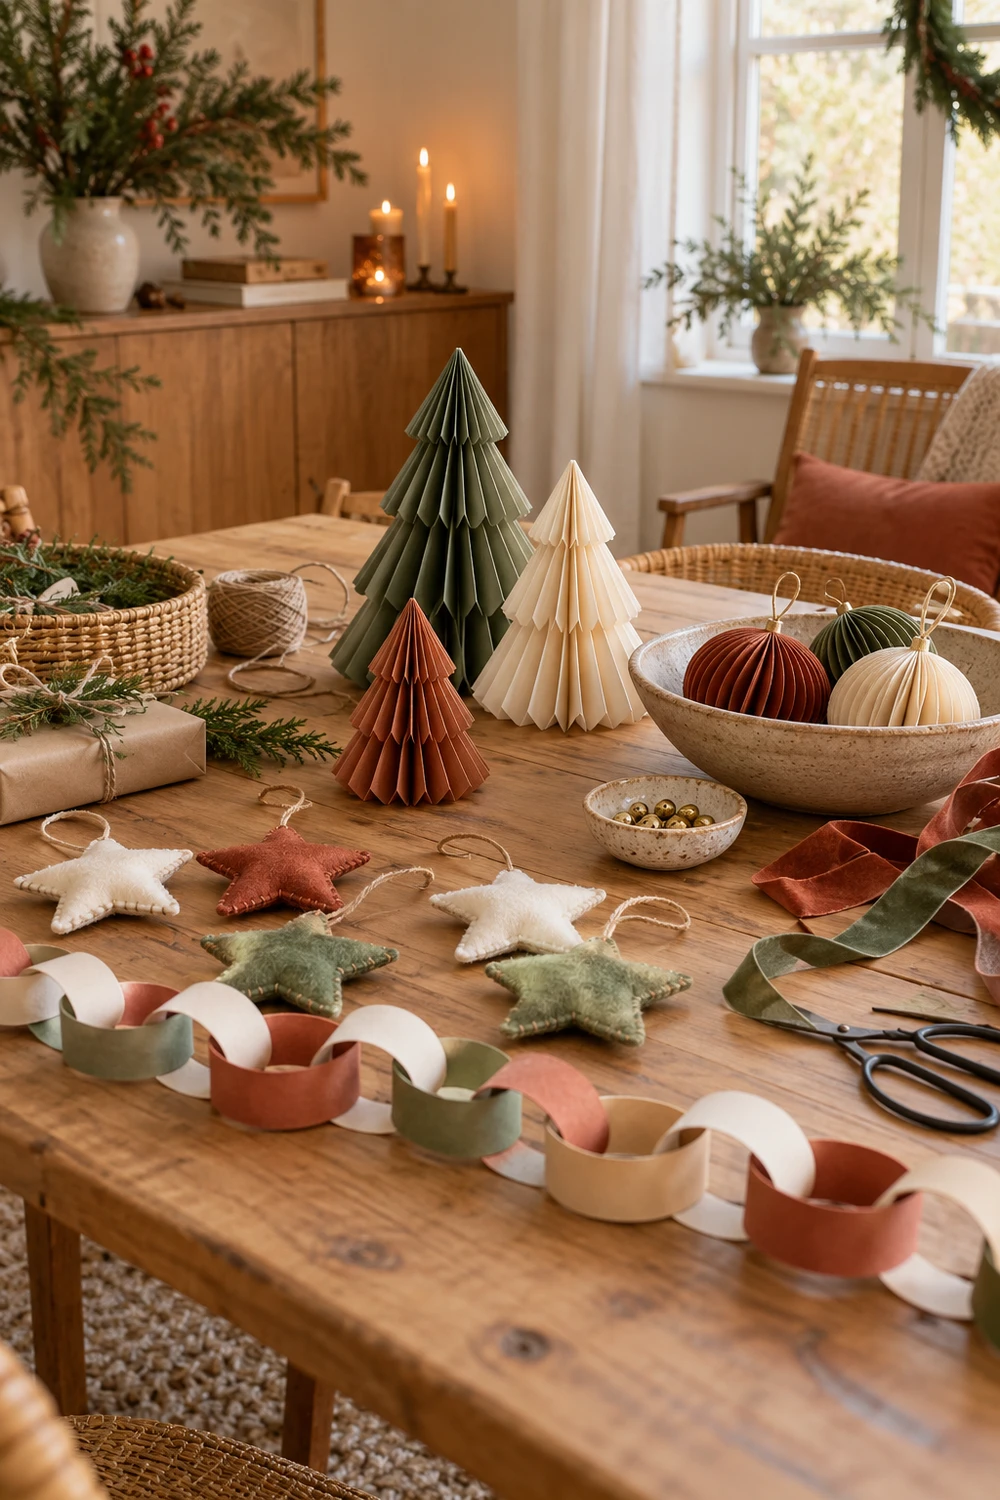
Choose paper colors that repeat details in your Christmas tree styling so the handmade pieces feel connected.
1. Accordion Paper Trees
Folded paper trees stand neatly on a shelf or sideboard. Make a few heights from the same cardstock for a small forest that stores almost flat.
- Fold a sheet into even accordion pleats
- Fold the pleated strip in half and glue the inner edges together
- Trim the outer edge into a tree silhouette and let the glue set before standing
Shop this look: Compare christmas cardstock paper to find the size and finish that suit your space.
2. Oversized Paper Stars
A large star fills an empty wall without a heavy frame. Use thick paper that can hold a crease and start with a printable fold guide if you are new to paper folding.
- Cut matching star shapes from cardstock
- Score and fold from each point toward the center for dimension
- Join a front and back shape around a hanging loop
Shop this look: Compare paper star craft kit to find the size and finish that suit your space.
3. A Cream and Red Paper Chain
Paper chains are easy to make while watching a holiday movie. Alternating two colors gives this familiar craft a more considered look.
- Cut paper into strips of equal width
- Glue the first strip into a loop
- Thread each new strip through the last loop before closing it
Shop this look: Compare paper glue sticks to find the size and finish that suit your space.
4. Folded Book Paper Trees
Use loose paper from damaged books rather than cutting up a book you enjoy. Their printed texture works especially well beside wood and neutral ornaments.
- Cut several matching tree silhouettes from loose paper
- Fold each down its center
- Glue half of one shape to half of the next and add a twine loop before closing
Shop this look: Compare book page craft paper to find the size and finish that suit your space.
5. Window Snowflakes
Paper snowflakes give a window a festive silhouette while allowing light through. Vary their size and keep a little empty space between them.
- Fold thin paper into a small wedge
- Cut small shapes from the folded edges with suitable scissors
- Unfold carefully and attach with a surface appropriate removable fixing
Shop this look: Compare paper snowflake craft supplies to find the size and finish that suit your space.
Simple Handmade Tree Ornaments
Make small keepsakes with felt, wood and leftover fabric.
6. Layered Felt Stars
Two felt stars stitched or glued together make a soft ornament. A smaller contrasting star on top gives the shape detail without fiddly decoration.
- Cut two matching stars and one smaller star
- Attach the small star to the front
- Join the large stars around a ribbon loop and let fabric glue cure fully
Shop this look: Compare felt sheets christmas ornaments to find the size and finish that suit your space.
7. Ribbon Scrap Trees
Short ribbon offcuts become branches when tied along a small stick. Different textures look good together when the colors stay within a limited palette.
- Choose a clean dry twig and tie twine at the top
- Knot ribbon strips along the twig
- Trim the strips from short at the top to longer at the bottom
Shop this look: Compare christmas craft ribbon scraps to find the size and finish that suit your space.
8. Painted Wooden Baubles
Flat wooden blanks offer an easy surface for stripes, dots or initials. Keep the design simple enough that you can repeat it across a small set.
- Smooth rough edges and wipe the blank clean
- Paint thin coats and allow them to dry
- Add a ribbon through the existing hanging hole
Shop this look: Compare wooden ornament blanks to find the size and finish that suit your space.
9. Fabric Wrapped Rings
A small craft ring wrapped in fabric becomes a miniature wreath. The soft finish suits a rustic tree and uses strips too narrow for many sewing projects.
- Wrap a fabric strip tightly around a craft ring
- Secure the ends with fabric glue
- Add a small bow and hanging loop after the glue dries
Shop this look: Compare small wooden craft rings to find the size and finish that suit your space.
10. Mini Photo Ornaments
Tiny frames turn a tree into a collection of family memories. Print copies of photos so the originals stay protected.
- Choose lightweight mini frames
- Trim photo copies to fit and secure the backing
- Add a hanging loop designed for the frame weight
Shop this look: Compare mini photo frame ornaments to find the size and finish that suit your space.
Garlands You Can Make at the Table
Repeat a simple shape to create a longer festive display.
Hang your finished garlands on a shelf or wall and keep them clear of heat. Our living room decor ideas can help you choose a focal point.
11. A Felt Ball Garland
A line of felt balls adds color without glitter or sharp edges. Leave short gaps of visible cord for a lighter look.
- Lay felt balls out in the order you want
- Use an appropriate needle to thread them onto strong cord
- Knot both ends and hang securely out of children reach
Shop this look: Compare felt balls for garland to find the size and finish that suit your space.
12. A Paper House Garland
A row of little paper houses works above a sideboard or along a wall. Draw a few different roof shapes while keeping the houses a similar height.
- Draw and cut house silhouettes from cardstock
- Add windows with a marker
- Punch hanging holes and thread onto twine
Shop this look: Compare kraft cardstock paper to find the size and finish that suit your space.
13. A Fabric Strip Garland
Knotted fabric strips create a soft, full garland. Cotton scraps in cream and red make a simple match for traditional decorations.
- Cut fabric into strips of similar length
- Fold each strip around a strong cord and pull its tails through the fold
- Slide the knots together to reach the fullness you want
Shop this look: Compare cotton christmas fabric bundles to find the size and finish that suit your space.
14. A Pine Cone Garland
Pine cones add natural texture to a plain shelf. Use clean dry decorative cones and strong cord, then test each attachment before hanging.
- Arrange cones with their best side facing forward
- Tie cord securely around each cone base
- Space the cones evenly and check the full garland weight
Shop this look: Compare craft pine cones to find the size and finish that suit your space.
15. A Folded Paper Bow Garland
Small paper bows give you a repeated ribbon shape without using fabric. A strip wrapped around the middle hides the join neatly.
- Fold a cardstock strip so both ends meet at the middle
- Pinch and secure the center with a narrow paper band
- Attach finished bows to twine after the glue dries
Shop this look: Compare colored craft paper to find the size and finish that suit your space.
Easy Table and Shelf Decorations
Build contained arrangements that are easy to move.
16. A Painted Jar Vase
An empty jar becomes a small vase with a soft painted finish. Keep it for faux stems if the paint you choose is not designed for regular washing.
- Wash and dry the jar thoroughly
- Apply paint made for glass following its instructions
- Let it cure and add a few faux evergreen stems
Shop this look: Compare glass craft paint to find the size and finish that suit your space.
17. Twine Wrapped Mini Trees
A cardboard cone wrapped with twine makes a textured tabletop tree. Place several on a tray and leave them unlit.
- Make or buy a stable cardboard cone
- Apply craft glue in short sections and wind twine around the cone
- Let it dry completely before adding a small wooden star
Shop this look: Compare cardboard craft cones to find the size and finish that suit your space.
18. A Bowl of Ribbon Wrapped Baubles
Old ornaments can take on a new color story with a few wraps of ribbon. Keep the finish smooth so the bowl does not look crowded.
- Choose clean intact ornaments
- Wrap narrow ribbon around each and secure it with suitable craft glue
- Arrange them in a shallow bowl after drying
Shop this look: Compare thin christmas ribbon to find the size and finish that suit your space.
19. A Painted Wooden Village
A few simple wooden house shapes make a small winter scene. Painting every house in the same cream tone helps different shapes feel like a set.
- Smooth wooden house blanks
- Apply thin coats of craft paint
- Add windows with a fine brush and arrange on a stable tray
Shop this look: Compare wooden house craft blanks to find the size and finish that suit your space.
20. A Greenery and Ornament Tray
A tray arrangement is an easy project when you do not want to paint or sew. Loose faux stems can be reused in another arrangement next year.
- Place two or three low objects on a tray
- Tuck faux greenery around their bases
- Add large ornaments without blocking the tray handles
Shop this look: Compare decorative christmas tray to find the size and finish that suit your space.
Handmade Details for Christmas Dinner
Small projects help the table feel personal.
Match these pieces with a low arrangement from our Christmas decor collection and leave room for serving dishes.
21. Cardstock Place Cards
Handwritten place cards make a simple dinner feel considered. A small evergreen drawing is enough decoration when the rest of the table is busy.
- Cut and fold thick cardstock into small tents
- Write each name before decorating
- Add a small painted branch and let it dry before setting the table
Shop this look: Compare blank place cards to find the size and finish that suit your space.
22. Ribbon Napkin Rings
A short length of ribbon can replace a napkin ring for one evening. Tie it loosely so guests can undo it without pulling the fabric.
- Fold each cloth napkin to a similar width
- Wrap ribbon around the middle
- Tie a small bow and trim the tails neatly
Shop this look: Compare velvet ribbon for napkins to find the size and finish that suit your space.
23. Mini Wreath Place Settings
A small craft ring wrapped with faux greenery sits neatly above a napkin. Keep all decorative pieces separate from food and remove them before serving.
- Wrap a small ring with thin faux greenery
- Secure loose ends using suitable craft fixings
- Add a name tag with a short ribbon
Shop this look: Compare mini wreath craft rings to find the size and finish that suit your space.
24. Stamped Kraft Cutlery Sleeves
A folded kraft paper sleeve contains cutlery and a napkin. A simple star stamp adds detail without requiring careful drawing.
- Fold a paper rectangle into a pocket
- Glue the side seam and let it dry
- Stamp the front and insert clean wrapped cutlery just before use
Shop this look: Compare christmas rubber stamps to find the size and finish that suit your space.
25. A Paper Table Runner
A length of kraft paper becomes a place for handwritten names and small drawings. Keep ink, glue and decorations away from food contact areas.
- Cut paper to suit the table
- Add a loose border of stars or branches
- Let all marks dry before placing dishes
Shop this look: Compare kraft paper roll to find the size and finish that suit your space.
Finishing Touches for Gifts and Doors
Use the remaining scraps before buying more supplies.
26. A Ribbon Bow Wreath
Tie repeated ribbon bows around a craft hoop for a soft, colorful wreath. Closely spaced bows hide the frame without a large pile of greenery.
- Choose a lightweight hoop
- Tie bows around it with knots facing the back
- Add a hanging loop and test it before displaying
Shop this look: Compare wreath craft hoop to find the size and finish that suit your space.
27. Reusable Fabric Gift Wrap
A square of fabric can wrap a small gift and become part of the present. Choose a fabric with enough drape for an easy knot.
- Place the gift diagonally in the center of a fabric square
- Fold two opposite corners over it
- Tie the remaining corners and tuck loose edges neatly
Shop this look: Compare christmas fabric gift wrap to find the size and finish that suit your space.
28. Hand Painted Gift Tags
A plain tag with a painted initial feels personal without a complicated design. Make a batch in one sitting and leave them flat until dry.
- Set blank tags on protected paper
- Paint a large initial or simple branch
- Thread ribbon through the hole after the paint dries
Shop this look: Compare wooden gift tags to find the size and finish that suit your space.
29. A Small Greenery Door Swag
A few faux branches tied at one end form a relaxed alternative to a round wreath. Keep the branch tips pointing downward and the back reasonably flat.
- Layer three or four stems with different lengths
- Bind the stems firmly with craft wire and cover the wire ends
- Add a bow and a secure hanging loop
Shop this look: Compare faux pine stems to find the size and finish that suit your space.
30. A Numbered Advent Basket
Small paper bags in a basket make a compact Advent display. Fill them with notes, activities or age appropriate treats.
- Number reusable bags before filling them
- Add one note or activity per bag
- Close each bag with a clip and arrange the numbers in order
Shop this look: Compare kraft advent calendar bags to find the size and finish that suit your space.
Make the Look Work in Your Home
A little planning makes the finished space easier to enjoy.
- Read the full project steps and gather materials before starting
- Protect the work surface and use tools appropriate for the material
- Keep scissors, needles, glue and small pieces away from unsupervised children
- Allow glue and paint to dry or cure for the time stated on the product
- Keep paper, fabric and dried materials clear of heaters and open flames
Frequently Asked Questions
Practical answers to common decorating questions.
How Do You Make DIY Christmas Decorations?
Start with one repeated shape and a short list of materials. Paper chains, ribbon bows and painted wooden ornaments are approachable first projects. Finish one sample before cutting the materials for a whole set. Explore our DIY crafts collection for more inspiration.
How Do You Make Tabletop Christmas Trees With String and Glitter?
Wrap string over a cardboard cone using craft glue, working in small sections. Let it dry fully, then add a little craft glitter only if desired. Leave the cone inside for support and use the tree as an unlit decoration. Explore our Christmas decorating ideas for more inspiration.
Choose One Idea to Start
Small changes can make a room feel more considered.
Choose two or three projects that share the same colors and materials. You will use up more of your supplies and finish with decorations that look as though they belong together.